Who Wouldn’t Want To Sew Many Colors?

In early January, a pattern making genius asked me if I wanted to test a foundation paper piecing project for her.  Naturally, I said yes.  I had already been familiar with Sheri Cifaldi-Morrill’s pattern prowess from having also tested her Picnic Petals quilt (that’ll be an entry for another time) and learned foundation paper piecing from her class for making her Deco Daybreak quilt pattern (also an entry for another time) that was published in Modern Patchwork magazine this past fall.  The opportunity to test a pattern as my second foundation paper piecing project ever seemed like a great personal challenge.

When the “Sew Many Colors” pattern landed in my inbox, I was immediately giddy as it was the perfect excuse to expand my Aurifil stash, which at that moment contained the basic neutral cream and white colors (#2310 and #2024 respectively).  It was also a good foray into modern design, as well as into the land of mini quilts, which is a landscape I’ve admired from a distance, but had never walked through up to that point.

First order of business was fabric pulling–easily one of my favorite parts of quilt planning.  I rifled through my stash of predominantly print fabrics and realized that I scarcely had any solids.  Prints just weren’t seeming like a good fit, or at least not the ones I own.  I set about sourcing some solids of Robert Kaufman’s Kona cottons.  I had already bought a bolt of white Kona (#1387) back in November (best fabric decision I made in 2016), which meant the background was already set, so I just needed to add some color–perfect excuse to go fabric shopping!

Results of my Kona cotton shopping spree from top to bottom: Cardinal (1063), Goldfish (474), Lemon (23), Leprechaun (411), Cyan (151), Prussian (454), Purple (1301), Peony (110), Putty (1303), and Medium Grey (1223).
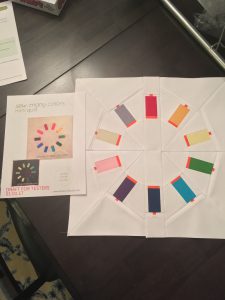
I branched away from the typical bright rainbow colors due to two reasons.  The first being that I wouldn’t think I would be likely to use super bright threads in the future as I like contrast thread for most projects.  The second one being that I wanted to include more colors that are usually forgotten when doing color oriented quilts, hence the inclusion of the cream and gray.

Thankfully, I now also have a colorful collection of threads to further play with in my quilting journey. Here’s the color number breakdown of the Aurifil hues used in my mini: red (2250), orange (2214), yellow (2110), green (2884), turquoise (2810), dark blue (2775), purple (4225), pink (2437), cream (2310), and gray (2606).

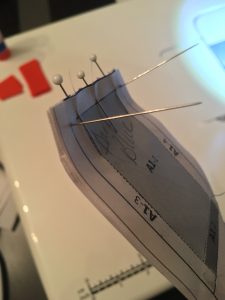
The pattern was so easy to follow and made the process so enjoyable–it’s so well written that I didn’t even make a single mistake when constructing my mini.  The most challenging part was connecting the spool segments in the right orders–but the pattern takes that challenge into account and provides a few spiffy tools to help with that part.  Here is a picture of my pinning to help keep my spool pieced aligned when combining them into a spool, but before attaching to spool segments together to make the mini top:
Once I had my mini top assembled, I began to think of how I wanted to quilt it.  I tested a thread spool quilting idea and quickly realized that it wasn’t conveying my vision, so out came Jack, my seam ripper–of course, this is where I was foolish and had started quilting on the actual mini itself (don’t do what I did–be smart and make a test spool or two).  In the end, I went with more of a thread painting concept in order to achieve the  beauty of the wound thread on an Aurifil spool of 50wt thread.
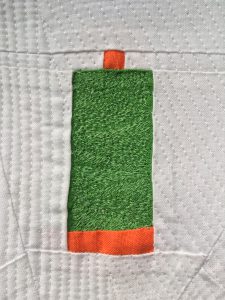
Then there was the matter of the white matter–soooo many potential options for the negative space from echo quilting to circles, but in the end I found that the thread weave from the spool itself was the most logical way for me to quilt it.

However, before a single quilt stitch could be put in place, I really wanted to deal with the center of the quilt.  The spools so wonderfully drew my eyes to the center every time I looked at the mini top, so instead of figuring out a center quilting pattern, I decided to do what I had never done before–embroidery.  Off to buy some 28wt Aurifil thread!  Their black 28wt (#2692) was easy to find, but their logo blue (#1320) wasn’t easily sourced except in 50wt, so I made do with what I could get.  Typically, if I have a project that requires an embroidered element, I rope my mother and her impressive skills into helping, but due to time considerations on both her end and mine, I tackled it myself–guess I can add a new skill to my resume.
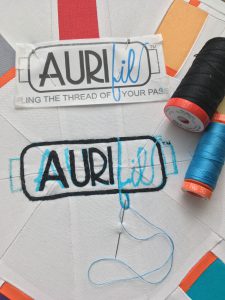
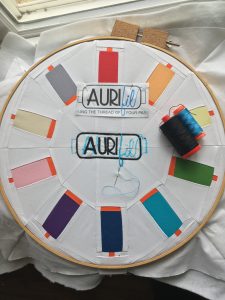
Upon completing my embroidery portion of the schedule and finally adding batting and a lovely Cardinal red backing, it was time for the fun part–quilting my mini!
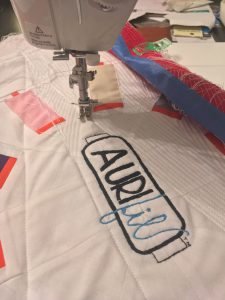
Matchstick quilting isn’t exactly what I was trying to achieve as it would have made the mini not lay flat well at all given the amount of space it would cover, so I went with a 1/8″ straight stitch in the spool wound pattern.  I divided the quilt, like I did the spools, with a zigzag to mark the outside edges of the spool pattern (and to semi-baste/stitch down the sandwich layers) and then made a center line within each zag in order to fill them in afterwards with the correct thread direction pattern.
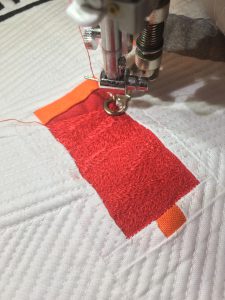
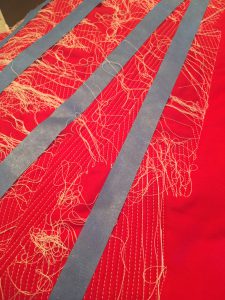
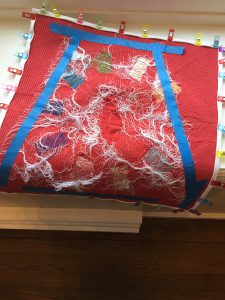
One difficulty I had created for myself was that with all those pretty straight lines, there were TONS of threads to keep out of the way of quilting the spools.  I didn’t want to bury all the white threads first before quilting the spools due to time issues and also, I like to deal with the back of my quilts all in one shot.  Enter the quilter’s secret weapon for thread wrangling: 1″ Blue Painter’s Tape.  I used my Clover curved awl to pull all my white Aurifil threads to the back on the quilt, then laid them in directions away from the spools, then taped them down with the 1″ blue tape.  The tape did zero damage to the fabulously strong Aurifil thread when removed–and some areas had a LOT of tape to keep strays from entering the danger zones of the spools (and also during my 1/8″ quilting marathon to keep threads tamed).
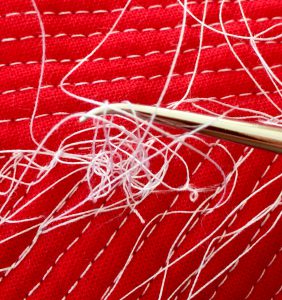
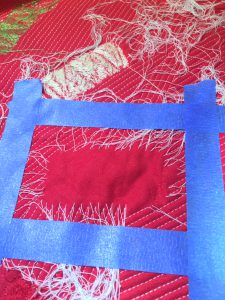
In full disclosure mode, I have to confess that I’m still burying threads (and was doing so all day yesterday) due to the sheer volume of threads and life also needing attention.
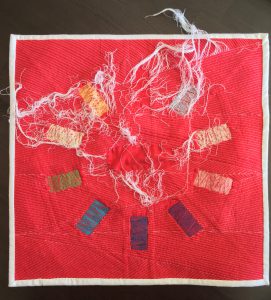
Today’s goal is finally bury all those snowy strands so I can start playing with more Aurifil thread and Kona cottons on my new project!

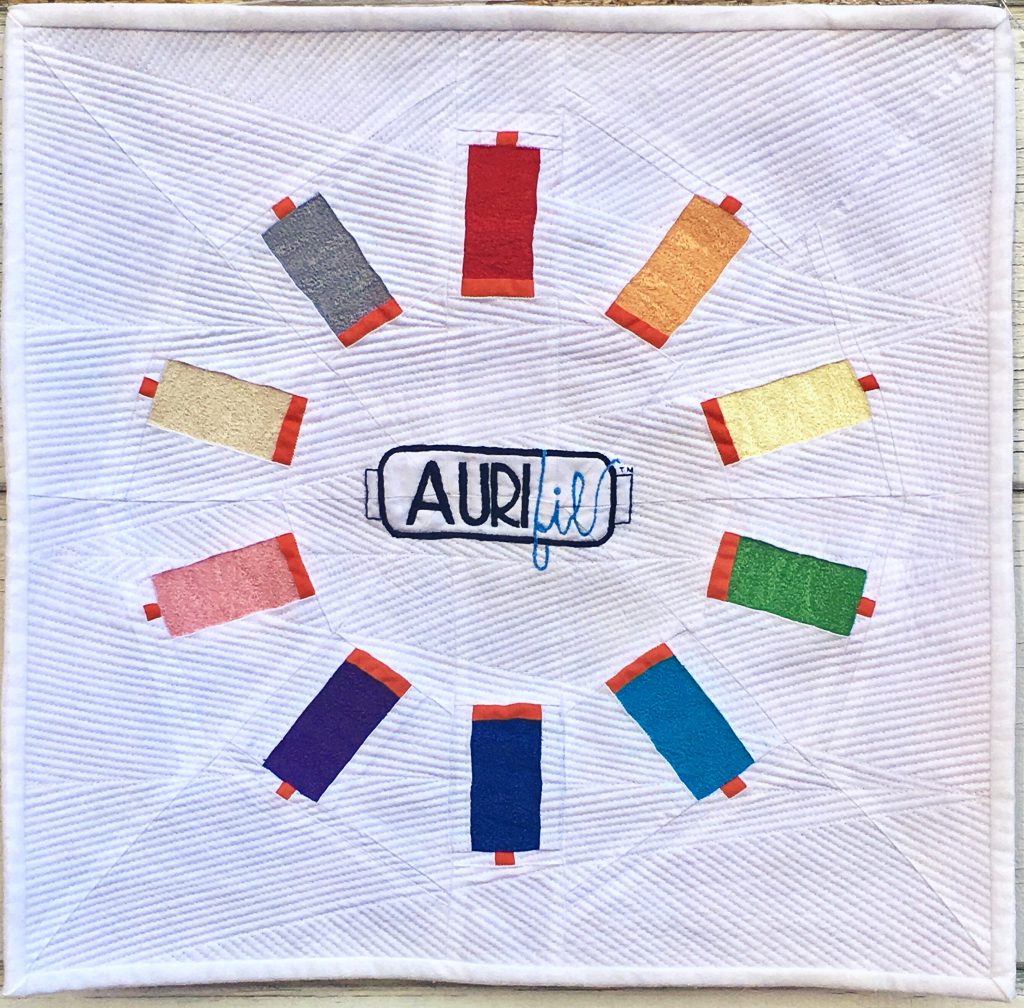
Full image of the finished front:
UPDATE March 4, 2017
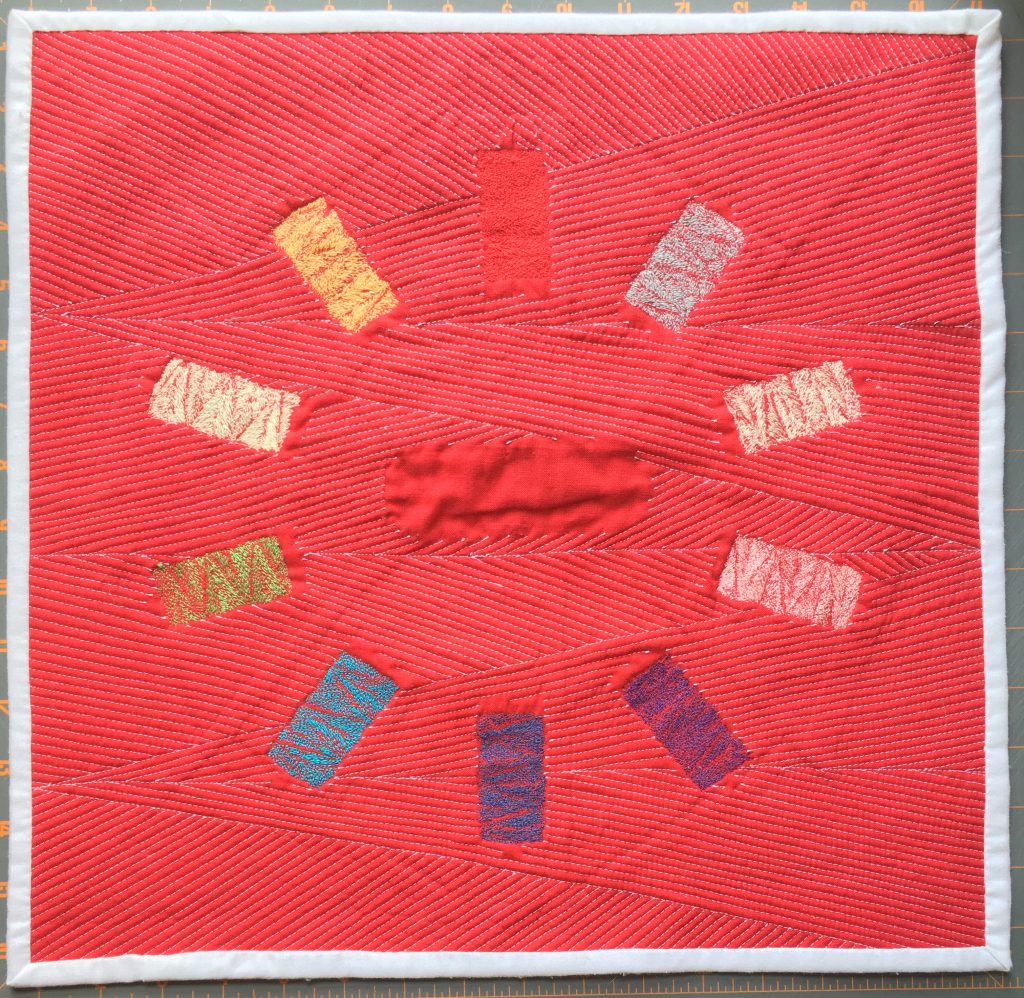
All threads have been buried and I’m loving the white Aurifil against the red Kona backing:
 

Trading Traditional for Modern

When I inherited a slew of quilting pattern books, I eagerly flipped through the pages looking for inspiration, but found very little. Churn dash squares with brown calicoes on cream and bear paws in maroon on black hardly instilled an urgency to create with fabric and thread. But when my mother mentioned that dear friends of her and my father were going to be celebrating their 50th wedding anniversary, the inspiration fairy finally paid me a visit.

The LeBlancs met each other while he was in the military in something that seems like the plot of a Bogey and Bacall movie.  They were those type of young people who bucked the trend of having a long engagement and a huge church affair followed by a dinner with hundreds of their closest friends. They also bucked the trend of having a rocky road due to the swiftness of their courtship, but sometimes you just know your soulmate and anyone who meets them just knows they were cut from the same cloth as well.

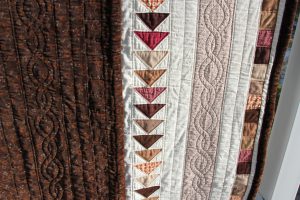
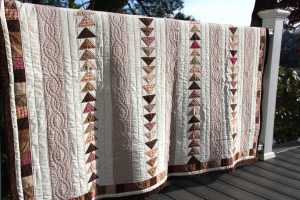
I wanted to commemorate their fifty years of marriage as a joint effort, because frankly it was. I decided that the Flying Geese pattern in one of my inherited books would be a good platform to start my dive off of into a quilting abyss. My mother told me their home was decorated in warm earth tones with chocolate brown leather sofas, cream walls and natural wood trim. Someone queue those calicoes. So two sets of fifty geese were sketched into four columns of 25 geese each, and spaced with a column of the background fabric and another set of columns in a low volume print to add more width to the quilt, and bordered with what seemed like a billion tiny 1.5″ squares made out of the geese fabrics. It was a clean, uncluttered plan of attack–almost modern.

A trip to a chain fabric store (the only option I knew of back in 2005) yielded a few sale finds of some rather non-traditional fabrics. My experiment a few years earlier with silk and denim and corduroy apparently had been a gateway to further debauchery as I took home copious amounts of micro suede in dark browns, a low pile tan velour, and a random, slippery knit. For the low volume (a term that I didn’t even know was a thing back then) columns, I found the perfect shade of tan with the tiniest American flags sprinkled like confetti on it as an acknowledgment of his years of service and the sacrifices she made during that time for their family. The geese and column fabrics all paired nicely with the vanilla standard cream flowers on cream background that seemed like the mandatory quilt background at the time–the store had no less than five bolts of this stuff and I am fearful to say that I still have a large stash of it to this day… But I got even with “traditional” when I decided to be utterly ridiculous in my backing fabric choices and splurged on a sumptuous chocolate velour with a delicate gold and burnt sienna orange flower print on it. That ought to teach those calicoes and vanilla cream flowers on cream who was a modern maker now.

But still, I wasn’t so modern as to machine quilt my daring escape from the land of tried and true quilt patterns and fabrics as I hand quilted the whole oversized throw. I even made my own stencil for the cable pattern I sewed in the flags on tan columns. It took 14 months just to quilt it and the heft of the backing necessitated the purchase of a sturdy quilting hoop on a stand as my wrists were developing issues from using a free standing hoop with the weight of the velour along with the batting and quilt top. We quilters suffer for our art daily (just count the pin and needle stabs to substantiate that claim).

I pulled a mean trick of partially gifting the quilt in December 2016 during their 50th anniversary party that their lovely children threw for them–I felt awful gifting part of a gift only to have to yank it back to finish it. I finished it as quickly as I could with a full time job and new husband myself, and delivered it a few months later. It seems that all my quilts are gifted in winter months due to circumstances, but upon reflection, it also seems fitting as who needs a quilt in the summer really?

Curious as to how my hand quilting work was holding up after a decade of use, I asked the LeBlancs if I could take newer pictures of the quilt in December of 2015 since cameras had advanced well beyond the 3 megapixels they were at when I initially photographed it before the final gift delivery. I was not only pleased to see that the quilting had yet to break a single stitch after a decade of use, but gleefully noted that it had a food stain of some sort on a section of that vanilla cream flowers on cream fabric background–a truly heartwarming sight to know that it wasn’t tucked away in a closet somewhere, but was being used in a modern home with a modern family full of traditions that apparently include fighting over who gets to use the velour backed anniversary quilt during their visit.

Journey Into Threaded Bliss with Fabric Trails

Chances are pretty great that you know someone who sews.  Probably a greater chance that the person doesn’t do more than just the occasional button repair or quick hem of a pant leg.  But then there are the lucky ones who know a sewist who creates functional art or pillowy adornments for your sofa or treasures to huddle beneath in the winter months.  At some point in time, I went from the button-repairer category to the sewist trying to create functional art because she believes everyone should have some pillowy adornments on their sofa to lean against whilst huddled beneath a treasured quilt.

My journey was started by the same manner in which most sewists become introduced to the intoxicating allure of bright colored threads and the beguiling textures–by a previous generation family member.  I was taught the general gist on how to make a quilt by my best friend’s grandmother when we lived with her for a summer in Falmouth, MA in 1993 during our college heyday.  We had summer jobs at a local restaurant and in the spare time when we were being lazy lumps around the house, Gram put us to work, but in a stealthy way.  One day her arthritis would make it difficult to use the rotary cutter, so would us girls help her for a bit?  Sure, Gram.   Another day it would be her knee giving her trouble with the angle of the seat at the sewing machine, so would us girls piece a few blocks and rows together for her?  Sure, Gram.  Another day it would be her back was too spastic to lean over the table to baste the quilt sandwich, so would us girls help if she handed us pre-threaded needles?  Sure, Gram.  By the end of our two and a half month stay, we had had our hands involved in at a least a dozen quilts and the majority of the steps to make a quilt.

Gram was a sly one, but she ran out of time before she could hoodwink us into helping to bind any quilts.  I went many years not reusing my learned skills from that salty aired summer.  Then one cold October day in Pelham, NY while shivering in my first apartment after college, and before the landlord was legally required to turn on the heat, I decided I was going to put my graduation present of a used Kenmore 10 Stitch sewing machine from the late ’80s to use.  In 1996, that machine was just what I needed to make a few curtains to keep out the drafts from the old windows in my pre-war apartment building.  It also was the perfect little workhorse for turning a collection of jean cutoff legs, a Dolman sleeved silk shirt and twirly skirt set, unfinished one piece jumper in a Mardi Gras colored paisley print and a few other odds and ends of fabrics I had collected without purpose, into a warm and cozy simple Nine Patch quilt with four inch squares.  Of course, I had no idea that it was a Nine Patch pattern as I had no books or other resources at the time–I was just concerned with trying to wrestle the batting and corduroy backing into place so I could start hand quilting and keep warm.  I should have been concerned with learning how to bind my new treasure I intended to huddle beneath.

A lot of things about the process of designing a quilt, and even the hand quilting itself, I simply puzzled out because it was the only option to progress.  I eventually inherited a few of Gram’s traditional sewing books as reference fodder a few years after making my first quilt, but still preferred to design my own quilts based on the intended recipient.  However, given the slow stitch method of hand quilting every one of my quilts until recently, I have few quilts to show off for my efforts.  My preferred hand quilting method is the stab-stitch one where I can really control the stitch length and allow for lovely curves and precise stitch placement–something I found wasn’t possible for me with the rocking-stitch method.  More recently though, I have moved onto machine quilting due to various reasons.  After nearly 20 years of doing only hand quilting and being taught that was the proper way to quilt, it seems somewhat of a betrayal of the tenants I was taught by Gram that sly summer.  I’m learning to embrace the modern way of making functional pieces of art and this blog will be the chronicling of my journey from traditional to modern.  I hope you’ll journey with me.

-Jenny