In early January, a pattern making genius asked me if I wanted to test a foundation paper piecing project for her. Naturally, I said yes. I had already been familiar with Sheri Cifaldi-Morrill’s pattern prowess from having also tested her Picnic Petals quilt (that’ll be an entry for another time) and learned foundation paper piecing from her class for making her Deco Daybreak quilt pattern (also an entry for another time) that was published in Modern Patchwork magazine this past fall. The opportunity to test a pattern as my second foundation paper piecing project ever seemed like a great personal challenge.
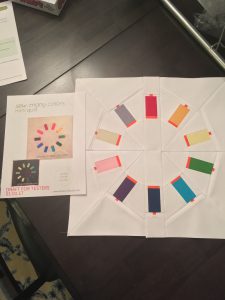
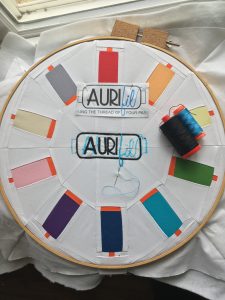
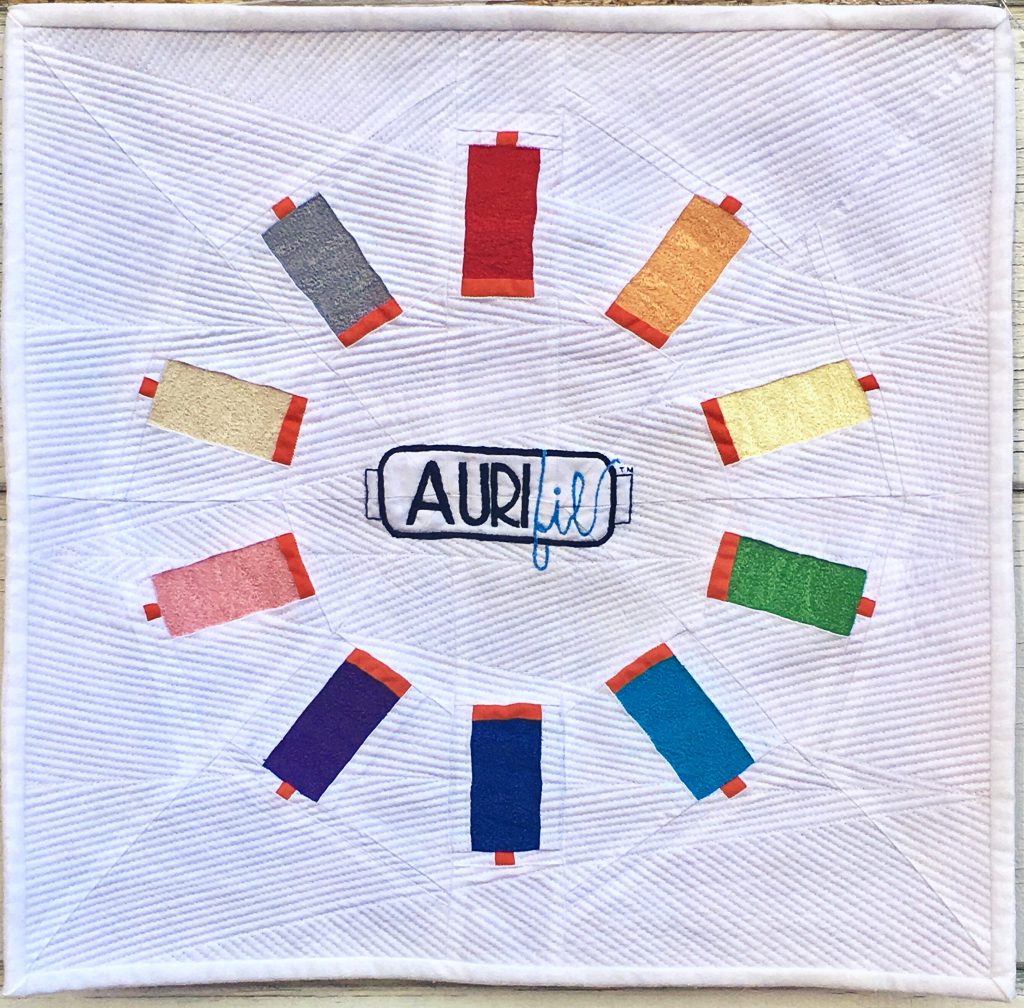
When the “Sew Many Colors” pattern landed in my inbox, I was immediately giddy as it was the perfect excuse to expand my Aurifil stash, which at that moment contained the basic neutral cream and white colors (#2310 and #2024 respectively). It was also a good foray into modern design, as well as into the land of mini quilts, which is a landscape I’ve admired from a distance, but had never walked through up to that point.
First order of business was fabric pulling–easily one of my favorite parts of quilt planning. I rifled through my stash of predominantly print fabrics and realized that I scarcely had any solids. Prints just weren’t seeming like a good fit, or at least not the ones I own. I set about sourcing some solids of Robert Kaufman’s Kona cottons. I had already bought a bolt of white Kona (#1387) back in November (best fabric decision I made in 2016), which meant the background was already set, so I just needed to add some color–perfect excuse to go fabric shopping!
Results of my Kona cotton shopping spree from top to bottom: Cardinal (1063), Goldfish (474), Lemon (23), Leprechaun (411), Cyan (151), Prussian (454), Purple (1301), Peony (110), Putty (1303), and Medium Grey (1223).
I branched away from the typical bright rainbow colors due to two reasons. The first being that I wouldn’t think I would be likely to use super bright threads in the future as I like contrast thread for most projects. The second one being that I wanted to include more colors that are usually forgotten when doing color oriented quilts, hence the inclusion of the cream and gray.
Thankfully, I now also have a colorful collection of threads to further play with in my quilting journey. Here’s the color number breakdown of the Aurifil hues used in my mini: red (2250), orange (2214), yellow (2110), green (2884), turquoise (2810), dark blue (2775), purple (4225), pink (2437), cream (2310), and gray (2606).
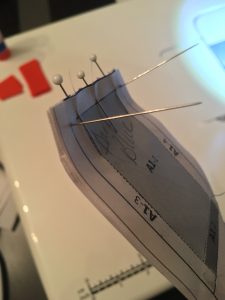
The pattern was so easy to follow and made the process so enjoyable–it’s so well written that I didn’t even make a single mistake when constructing my mini. The most challenging part was connecting the spool segments in the right orders–but the pattern takes that challenge into account and provides a few spiffy tools to help with that part. Here is a picture of my pinning to help keep my spool pieced aligned when combining them into a spool, but before attaching to spool segments together to make the mini top:
Once I had my mini top assembled, I began to think of how I wanted to quilt it. I tested a thread spool quilting idea and quickly realized that it wasn’t conveying my vision, so out came Jack, my seam ripper–of course, this is where I was foolish and had started quilting on the actual mini itself (don’t do what I did–be smart and make a test spool or two). In the end, I went with more of a thread painting concept in order to achieve the beauty of the wound thread on an Aurifil spool of 50wt thread.
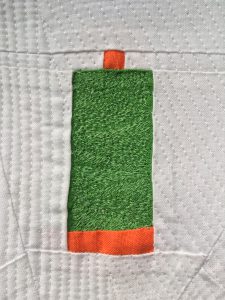
Then there was the matter of the white matter–soooo many potential options for the negative space from echo quilting to circles, but in the end I found that the thread weave from the spool itself was the most logical way for me to quilt it.
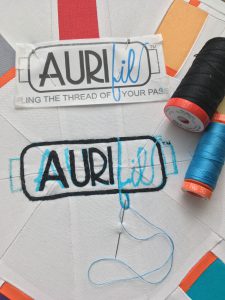
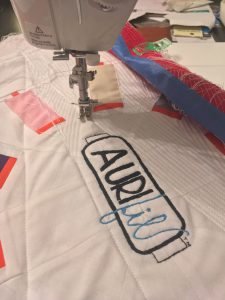
However, before a single quilt stitch could be put in place, I really wanted to deal with the center of the quilt. The spools so wonderfully drew my eyes to the center every time I looked at the mini top, so instead of figuring out a center quilting pattern, I decided to do what I had never done before–embroidery. Off to buy some 28wt Aurifil thread! Their black 28wt (#2692) was easy to find, but their logo blue (#1320) wasn’t easily sourced except in 50wt, so I made do with what I could get. Typically, if I have a project that requires an embroidered element, I rope my mother and her impressive skills into helping, but due to time considerations on both her end and mine, I tackled it myself–guess I can add a new skill to my resume.
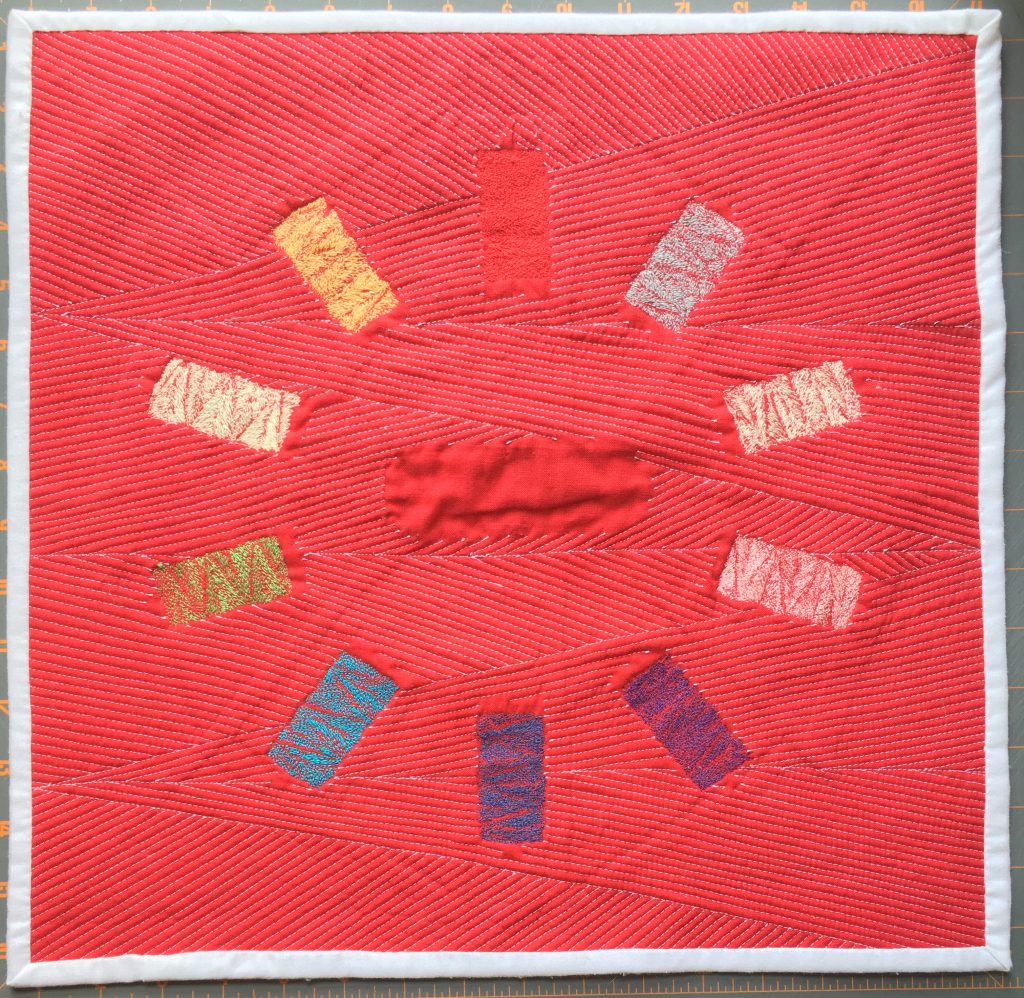
Upon completing my embroidery portion of the schedule and finally adding batting and a lovely Cardinal red backing, it was time for the fun part–quilting my mini!
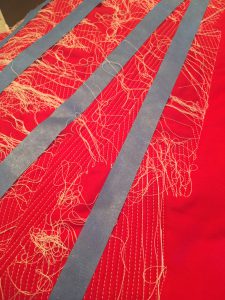
Matchstick quilting isn’t exactly what I was trying to achieve as it would have made the mini not lay flat well at all given the amount of space it would cover, so I went with a 1/8″ straight stitch in the spool wound pattern. I divided the quilt, like I did the spools, with a zigzag to mark the outside edges of the spool pattern (and to semi-baste/stitch down the sandwich layers) and then made a center line within each zag in order to fill them in afterwards with the correct thread direction pattern.
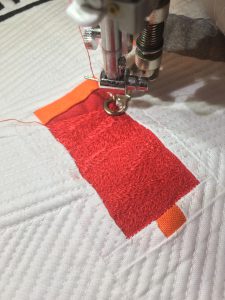
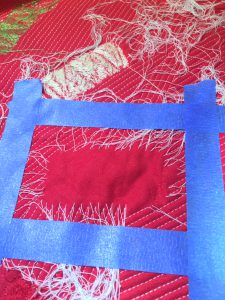
One difficulty I had created for myself was that with all those pretty straight lines, there were TONS of threads to keep out of the way of quilting the spools. I didn’t want to bury all the white threads first before quilting the spools due to time issues and also, I like to deal with the back of my quilts all in one shot. Enter the quilter’s secret weapon for thread wrangling: 1″ Blue Painter’s Tape. I used my Clover curved awl to pull all my white Aurifil threads to the back on the quilt, then laid them in directions away from the spools, then taped them down with the 1″ blue tape. The tape did zero damage to the fabulously strong Aurifil thread when removed–and some areas had a LOT of tape to keep strays from entering the danger zones of the spools (and also during my 1/8″ quilting marathon to keep threads tamed).
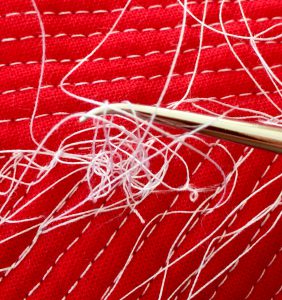
In full disclosure mode, I have to confess that I’m still burying threads (and was doing so all day yesterday) due to the sheer volume of threads and life also needing attention.
Today’s goal is finally bury all those snowy strands so I can start playing with more Aurifil thread and Kona cottons on my new project!
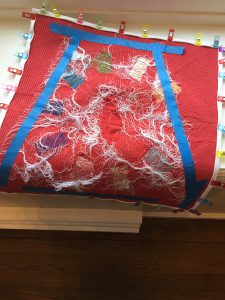
Full image of the finished front:
UPDATE March 4, 2017
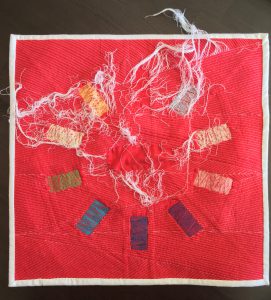
All threads have been buried and I’m loving the white Aurifil against the red Kona backing:
Amazing
I absolutely LOVE that you added the embroidered Aurafil logo!!
You did amazing on your first embroidery, wish I had thought of that, I love it! And the painter’s tape tip, very cool, thanks for showing your process.